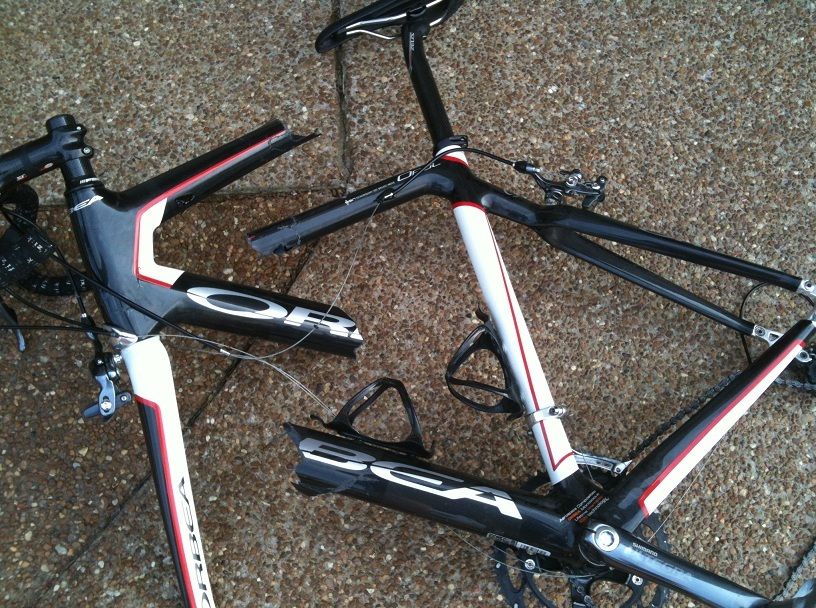
While under certain types of load, carbon fiber is significantly stronger than steel, titanium, or aluminum, it generally does not handle clamping force as well as other frame materials. A carbon fiber seatpost, for instance, may easily handle the rigors of Paris Roubaix, but will crack on a ride to the coffee shop if it’s been over-tightened at the clamp. In order to prevent unexpected failure, carbon fiber and all essential components–irrespective of material–should be tightened with a torque wrench to manufacturers’ recommended specifications.
What’s torque? Torque is a measure of the turning force on an object like a bolt or spindle. It doesn’t actually measure clamping force, but can be a good proxy for it. Torque wrenches measure force in units called “Newton Meters” or “Inch Pounds.” (1 NM = 8.85 In-Lb.) Some torque wrenches provide an audible and tactile “click” when you hit the right torque.
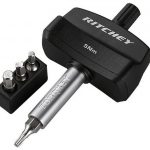
What kind of torque wrench should I get? If you only need to adjust your seatpost and stem, a simple, inexpensive “Fixed Value” wrench will do. These wrenches have a preset torque value (5nm being the most common) and will “click” when you’ve hit it. You can get a good fixed-value torque wrench for between $15 and $40.
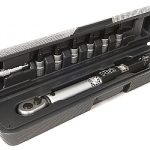
If you do more extensive mechanical work, you’ll need a “Variable Value” torque wrench. A typical variable value wrench will read from 2nm to 20nm, which can handle just about any nut or bolt on a bike. You will need a larger torque wrench to handle crank bolts, which can be rated to over 50nms. Variable value torque wrenches range from $40 to $300. A $100 wrench will usually get you good quality tool with bits for most common fittings on a bike.
 Fixed Value Torque Wrench |
 Variable Value Torque Wrench |
On which nuts and bolts should I use a torque wrench? The simple answer is “on every single nut and bolt.” While high-end, lightweight components are most likely to be damaged by over-torquing, pretty much every nut or bolt has an optimal torque at which it won’t cause damage and is unlikely to come loose.
How do I know what torque setting to use? Many parts have a torque value printed right on them, but remember there are 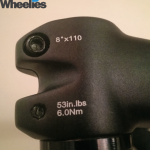 always 2 parts to consider: The part doing the clamping and the part being clamped. In the picture to the right, the stem has a max torque of 6nm, but the carbon steertube may only withstand the clamping force at 5nms. Torque values are usually listed as “max-values,” so start low and check to see if the item holds firm.
If unsure of torque specifications, always call the manufacturer.
Note: A greased bolt will drive further at the same torque than will an un-greased bolt. Many – but not all – torque specifications presume a greased bolt. If unsure, call the manufacturer. Again, ALWAYS manually test how well a part is secured by twisting, pushing, and pulling on it to simulate actual riding. Do not assume a part is secure simply because it has been tightened to the recommended torque value.
What if no torque rating is listed and I can’t get in touch with the manufacturer? As a last resort, you can take a guess at a torque value based on the size hex bolt used.
Common torque values:
3mm hex — 2-3nm
4mm hex — 4-5nm
5mm hex — 6-8nm
WARNING: Not all manufacturers use the appropriate size bolts. It’s never safe to assume that the bolts in your bike represent the appropriate torque value. (Waterbottle cage bolts are almost always larger than needed.)
What if I tighten something to max torque and it still moves? A little friction compound (also called “carbon paste”) applied to the moving part – such as the shaft of a seatpost – may allow parts to hold tight at low torque. Be advised, some manufacturers recommend against using friction compound on steertubes and other delicate parts. If an item still does not hold at the specified torque with friction compound, call the manufacturer – the item may be out of spec or it may be damaged from previous excessive torque.
What about parts with multiple bolts?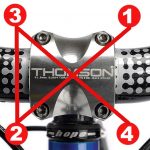 When parts have multiple bolts, the bolts must be tightened sequentially. You should increase torque by a small amount on one bolt, then move to the next until all bolts are at the specified torque. With four bolts or more, you should tighten in a crisscross pattern to distribute pressure evenly over the greatest surface area.
Mention this post during March of 2017 and get 25% off any torque wrench we sell at Durham Cycles!