Who Needs a Custom Bike?

As a fitter, I’m often asked, “Who really needs a custom bike”? Over the last 20 years, I’d estimate that no more than 5% of the riders I’ve fit need something custom in order to have a bike that will be comfortable and handle well. Perhaps another 5-10% may get a noticeably better fit and ride out of a custom bike, but can likely be happy enough on a stock frame. These numbers can increase significantly if you’re in a subgroup that isn’t well served by the bicycle industry. If you’re particularly tall or short, for instance, or if you have reduced flexibility or mobility issues, you are unlikely to find an off-the-shelf bike that will work particularly well. Yet, even if you’re not among the small percentage of riders who truly need a custom frame, there are lots of benefits to going custom. Let’s consider a few of the compromises necessary with mass produced bikes:

(1) Any off-the-shelf bike needs to work for a 100lb rider or a 300lb rider; for a sprinter or a climber. In order to withstand the worse case abuse by heavy and powerful riders, all production bikes are essentially overbuilt and are too laterally and vertically stiff for most mid-sized and smaller riders. This actually becomes increasingly true on more expensive, high-modulus carbon frames, which typically sacrifice all compliance for weight reduction.

(2) Bottom brackets on most mass produced bikes are too high. Manufacturers increase bottom bracket height to reduce the likelihood of striking a pedal when leaning deep into corners, but very few riders need bikes that can be pedaled while at extreme cornering angles and most riders would prefer the stability of a low bottom bracket. In fact, prior to the advent of carbon bikes, which are made in expensive molds (limiting the number of frame variations a manufacturer can produce), some manufacturers had bikes with higher bottom brackets for American style “crit racing” and bikes with lower bottom brackets for stability on fast, winding, European style descents.

(3) Off-the-self bikes are designed to eliminate “toe-overlap” –  the phenomenon of a rider’s toe hitting the front wheel when making sharp turns at very slow speeds. (At higher speeds, you turn by leaning, not by turning the handlebars.) Until you become accustomed to it, toe-overlap may indeed cause a low speed spill in the parking lot before your ride. In order to reduce toe-overlap, however, manufacturers increase fork “rake” (the forward curvature of the fork blades), which can make handling unstable at speed, which is arguably more dangerous than toe overlap.

(4) Manufacturers choose materials that have marketing value, but don’t necessarily produce the best ride quality. The strength to weight ratio of carbon fiber is phenomenal and because the material can be formed in molds, it is easy for manufacturers to produce distinctive looking bikes at marketable low weights. Materials such as steel, titanium, and carbon/titanium blends, may weigh a few grams more and have a more traditional look, but generally have a far more supple and responsive ride. (Of course, with smart component specifications, you can build a custom bike as light or lighter than an off-the-shelf bike. We’ve built some gorgeous, feather-light machines.)

Despite the above compromises, the quality and performance of modern production bikes is remarkable and remains a sensible choice for most riders; yet, there are elements of a hand-crafted bike, built specifically for an individual, that just can’t be replicated with an off-the-shelf product and there are plenty of good arguments for getting a custom bike other than “needing one.”

You Don’t Know Fit

Bikes are in some ways like clothes – most people can get something “off-the-shelf” that fits well enough to make them happy. If you’re serious about fashion or serious about cycling, however, fit gets a bit more complicated. In many cases, a rider will be “in-between” sizes, and while he or she can be made equally comfortable with a larger or smaller frame, each frame will handle quite differently.  So how does a fitter decide which size is best if a rider can be equally comfortable on two different frames?

We’ll use Sarah Guilbert, elite rider for the RTO National Women’s Team, as our case study. Guilbert’s fit session dropped her from a 52cm frame down to a 47cm frame. Here is how we decided on her new frame size:

We began by measuring Guilbert on her existing bike, a 52cm Scott addict with an 80mm stem.

Almost all of Guilbert’s angles on this bike are within the normal range for an athletic, competitive racer. Her knee angle (grey lines) of 149° is a bit higher than we’d place a recreational cyclist, but provides excellent leverage. Her hip angle of 114° (black lines) is comfortable when climbing or in the pack, but still allows a low, powerful, and aerodynamic position when in the drops or with wrists draped on the hoods. The only issue with the fit is the shoulder angle of 100° (red lines). Shoulder angles greater than 90° tend to fatigue the upper arms and lower back. While we can theoretically shorten the stem and get the shoulder angle where we want it, shorter stems increase steering response and can make for “twitchy” handling – which isn’t something a pro wants when speeding down hills at 60 miles an hour or when riding shoulder-to-shoulder in a pack. Further, even if we reduce the length of the stem to create a more comfortable fit, the bike simply will remain too “long” to handle well, as illustrated in the photo below.

Note that the weight of Guilbert’s shoulders (red-line) falls behind the steering axis of the bike (green line), preventing her from properly weighting the front wheel for traction when cornering. A shorter stem does not change the position of a rider’s shoulders relative to a bike’s steering axis. One could theoretically increase Guilbert’s weight on the front wheel by sliding her hips forward, but that would compromise the efficiency of her pedal stroke. The only way to get the rider’s weight distributed properly between the wheels in this case is to decrease the bike’s “front-center” measurement, the distance from the bottom bracket to the front hub (orange line).

If we reduce the bike’s frame size, we decrease the front-center measurement, moving the bike’s front wheel under the rider’s shoulders, which will provide more balanced weight distribution and better traction. Combine the better traction with the tight turning radius of a smaller frame and the stability of a longer stem (which has been increased by 1cm to make up for the shorter top-tube), and Guilbert’s new bike should have a nimble but predictable ride.

Here is Guilbert on her new 47cm frame:

You’ll notice all measurements are identical to the larger bike, except for the shoulder angle which has been reduced to the target of 90 degrees. Looking at the bike in action, we can see how the change in weight distribution improves cornering.

Guilbert’s shoulders (red line) are now directly in-line with the bike’s steering axis (green line), allowing her to drive the front wheel into the ground as she counter-steers into the turn.

Here is the difference between the two bikes by the numbers:

52cm Frame 47cm Frame
Head Tube Length 120mm 110mm
Seat tube angle 74° 74.5°
Chainstay Length 41cm 40.5cm
Top Tube Length 53.5cm 51cm
Stem Length 80mm 90mm
Handlebar reach 45.3 44.2
Handlebar stack 57.3 57.3

There are significant differences in the measurements between the larger and smaller bikes, but note that the stack of the handlebars is identical and that the reach is only 1cm shorter.  The changes to the bike’s fit are minor, but the changes to the function are significant.

To return to our original analogy, had Guilbert been a casual rider whose bike didn’t need to perform in extreme conditions, we may have just tailored her “off-the-shelf” fit with a shorter stem – but, just as someone needs a suit or dress cut a differently for walking the red carpet or for spending nights out dancing, one needs a bike set-up differently depending on how it is to be used. In the end, an experienced bike fitter will make decisions based not just on how your body fits your bike, but how your bike fits your needs.

David LoSchiavo

Guilbert didn’t have time for a test ride and wound up racing her new frame days after picking it up:

“Despite a very fast race (25.7 mph!), congested corners, and being forced over the feet of the barriers multiple times, this bike made my ride easy (as easy as a pro crit can be, anyway). Thank you so much Scott Bikes and David LoSchiavo!”


How to Buy a Used Bike

Used bikes are a great option for many riders. You’ll save some money and give a long-lived machine new life. That said, purchasing a used bike can be difficult. Every year at Durham Cycles we see students who’ve purchased used bikes that are too large or too small; that require expensive repairs; or are clearly stolen property. So how do you protect yourself and get the right bike for your needs?

The easiest way to ensure the size, quality, and condition of a bike is to buy used from a reputable bike shop. If your local bike shop doesn’t have anything used, however, here are a few simple steps you can take to make sure you get what you need.

  • Know your size.
    • The chart at the bottom of this page provides a general sizing guide for most types of bikes. Remember, however, that bikes can all fit a bit differently depending on the brand, so be sure to take a test ride.
  • Know what type of bike you need.
    • For commuters, you’ll be looking for something called a city-bike, hybrid, or fitness bike. These bikes are well suited for practical use and can usually be outfitted with a rack and fenders. Mountain bikes with road tires can also make great commuter bikes. Do not buy a bike with suspension or designed for serious off road use. (Front suspension isn’t a deal-breaker, but rear suspension is.)
  • Know how much to spend.
    • The seller’s asking price is sometimes less relevant than the price when the bike was new. A bike that cost $450 or more when new is generally of high enough quality to be worth fixing when parts wear out.
  • Determine if the bike needs repairs or is excessively worn.
    • The easiest way to do this is to ask the seller to meet you at a local bike shop. This will be a safe space for both parties and will give you the opportunity to have the bike’s condition evaluated by a professional. Many shops do not charge for this service, but it’s courteous to pay the mechanic a few dollars or to buy some accessories at the shop to thank them for their time. Do not buy a bike from someone who will not meet you at a bike shop – the bike is either stolen or the seller is up to no good!

Finally, don’t commit to rent anything sight-unseen. We’ve seen this scam more than once. Someone will rent a bike for $50 to $100 from a landlord only to find themselves with a bike taken from a dumpster or purchased from a department store for less than the rental price!

Sizing chart*

Height in inches

Frame Size Nominal

Typical sizing for city-bikes

Frame Size in Inches

Typical sizing for MTB and some city-bikes

Frame Size in CM

Typical sizing for road bikes

5’0” to 5’5” XS – SM 13” – 15” 47cm to 52cm
5’5” to 5’7” SM – SM/MD 15” – 17” 52cm
5’7” to 5’9” SM/MD – MD 17” – 19” 54cm
5’9” to 5’11” MD – LG 19”– 21” 56cm
5’11” to 6’1” LG 21” – 22” 58cm
6’1” to 6’3” LG – XL 22” – 23” 60cm
6’3” to 6’5″ XL 23” or greater 62cm

*Not all companies measure their bikes in the same way. The chart above is rough guide and may not ensure the proper fit.

90% Assembled?

Bike shops are often asked why they charge one or two hours of labor to assemble a bike which is described by the manufacturer as “90% assembled.” Watch the video and read the post below to see what goes into a typical bike assembly at Durham Cycles.

So if it take one or two hours to assemble a typical bike, how is it that companies can say that their bikes are “90% assembled”? …


To the right are all the constituent parts of a bicycle. For a single mechanic to assemble these parts to the point where the bike is ready to ship can easily take 6 or 7 hours. If it takes an other hour or two to complete the job, then the bike was indeed – roughly – 90% assembled.

Of course, the implication of “90% assembled” is that the bike can be easily completed in a few minutes with no special skills or tools. Certainly, there are many people capable of completing a home bike assembly well, but it’s not something that as many people would undertake if they knew what professional assembly entails, or if they knew the difference in the ride quality and longevity of a professionally assembled bike.

 
Cynically, one might conclude that bike companies aren’t being forthright because an online bike purchase may not seem like such a good deal if the buyer factors in the cost of professional assembly.  More charitably, bike companies are new to the online world and are still working out ways to ensure their bikes are assembled well enough to provide a good customer experience. Some brands, for instance, now sell online, but require in-store, fully assembled pick-up. Others offer professional assembly as an “add-on” feature for online sales. Of course, your local bike shop is always glad to assemble your bike and will provide any post-assembly service needed.


Torque it Right

While under certain types of load, carbon fiber is significantly stronger than steel, titanium, or aluminum, it generally does not handle clamping force as well as other frame materials. A carbon fiber seatpost, for instance, may easily handle the rigors of Paris Roubaix, but will crack on a ride to the coffee shop if it’s been over-tightened at the clamp. In order to prevent unexpected failure, carbon fiber and all essential components–irrespective of material–should be tightened with a torque wrench to manufacturers’ recommended specifications.

What’s torque? Torque is a measure of the turning force on an object like a bolt or spindle. It doesn’t actually measure clamping force, but can be a good proxy for it.  Torque wrenches measure force in units called “Newton Meters” or “Inch Pounds.” (1 NM = 8.85 In-Lb.) Some torque wrenches provide an audible and tactile “click” when you hit the right torque.

What kind of torque wrench should I get? If you only need to adjust your seatpost and stem, a simple, inexpensive “Fixed Value” wrench will do. These wrenches have a preset torque value (5nm being the most common) and will “click” when you’ve hit it. You can get a good fixed-value torque wrench for between $15 and $40.

If you do more extensive mechanical work, you’ll need a “Variable Value” torque wrench. A typical variable value wrench will read from 2nm to 20nm, which can handle just about any nut or bolt on a bike. You will need a larger torque wrench to handle crank bolts, which can be rated to over 50nms. Variable value torque wrenches range from $40 to $300. A $100 wrench will usually get you good quality tool with bits for most common fittings on a bike.

ritcheytorquekey5nm

Fixed Value Torque Wrench

Variable Value Torque Wrench

Variable Value Torque Wrench

On which nuts and bolts should I use a torque wrench? The simple answer is “on every single nut and bolt.” While high-end, lightweight components are most likely to be damaged by over-torquing, pretty much every nut or bolt has an optimal torque at which it won’t cause damage and is unlikely to come loose.

How do I know what torque setting to use? Many parts have a torque value printed right on them, but remember there are stem_torque
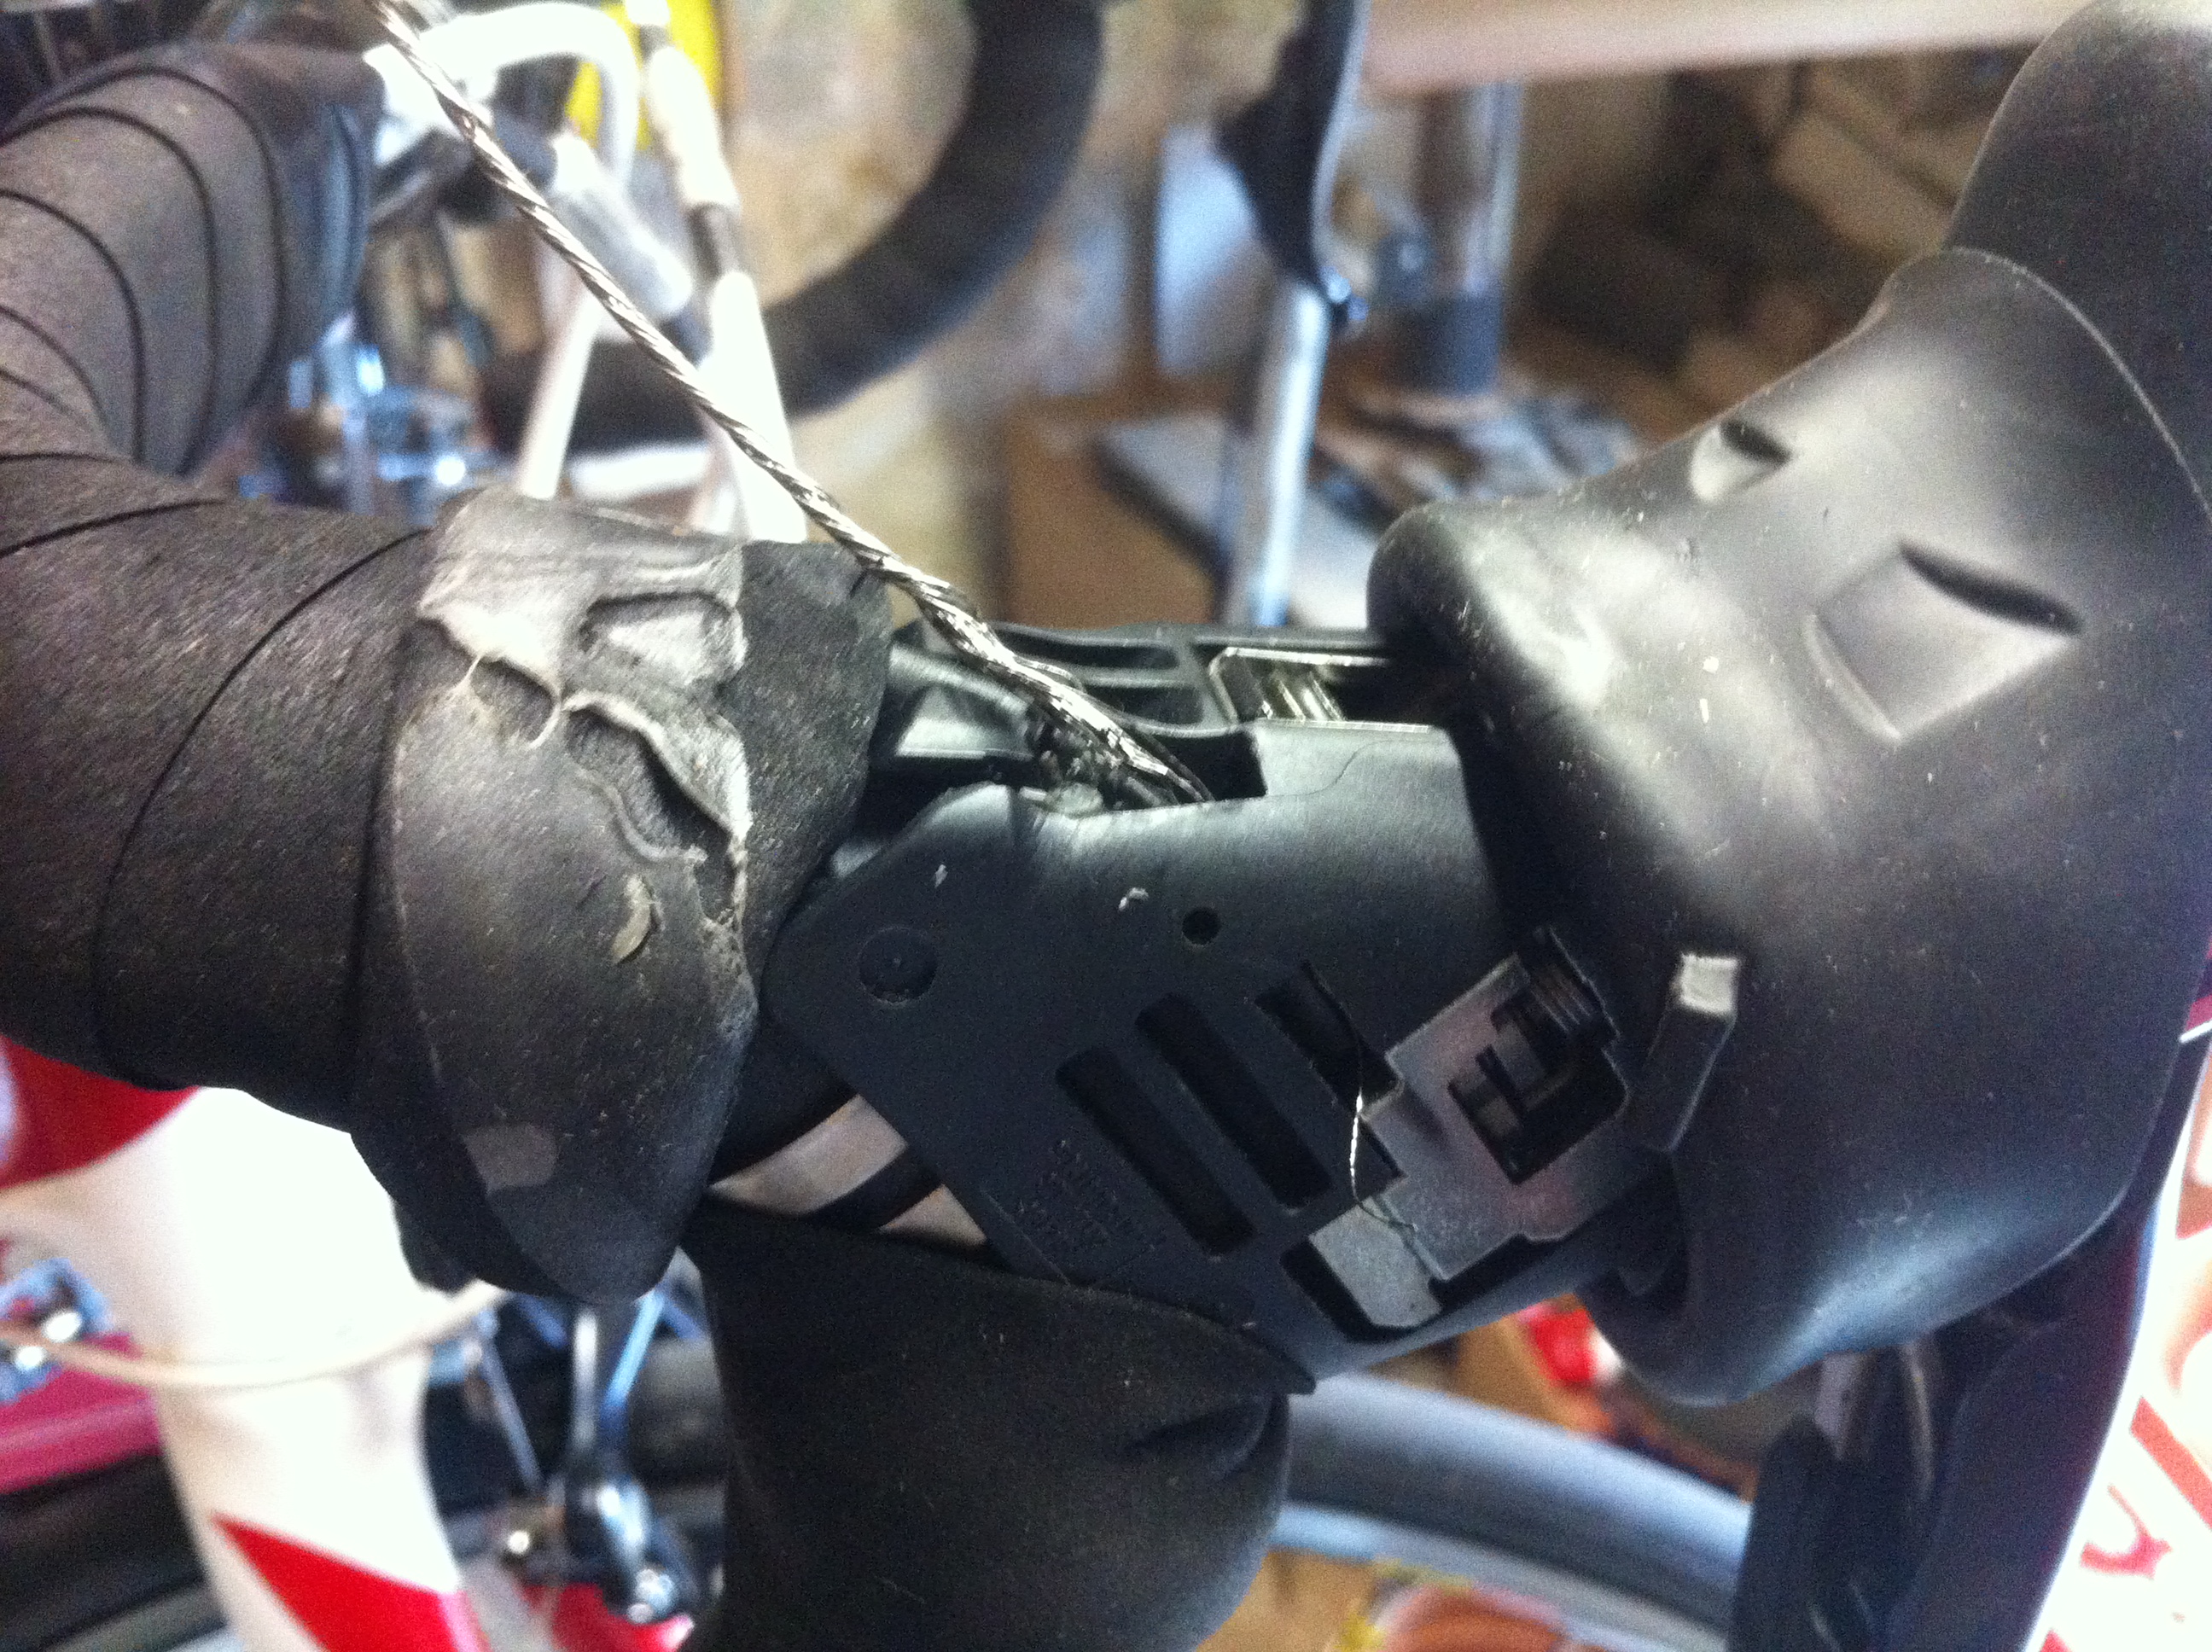
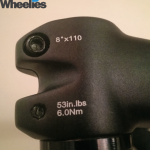
always 2 parts to consider: The part doing the clamping and the part being clamped. In the picture to the right, the stem has a max torque of 6nm, but the carbon steertube may only withstand the clamping force at 5nms. Torque values are usually listed as “max-values,” so start low and check to see if the item holds firm.

If unsure of torque specifications, always call the manufacturer.

Note: A greased bolt will drive further at the same torque than will an un-greased bolt. Many – but not all – torque specifications presume a greased bolt. If unsure, call the manufacturer. Again, ALWAYS manually test how well a part is secured by twisting, pushing, and pulling on it to simulate actual riding. Do not assume a part is secure simply because it has been tightened to the recommended torque value.

What if no torque rating is listed and I can’t get in touch with the manufacturer? As a last resort, you can take a guess at a torque value based on the size hex bolt used.

Common torque values:

3mm hex — 2-3nm

4mm hex — 4-5nm

5mm hex — 6-8nm

WARNING: Not all manufacturers use the appropriate size bolts. It’s never safe to assume that the bolts in your bike represent the appropriate torque value. (Waterbottle cage bolts are almost always larger than needed.)

What if I tighten something to max torque and it still moves? A little friction compound (also called “carbon paste”) applied to the moving part – such as the shaft of a seatpost – may allow parts to hold tight at low torque. Be advised, some manufacturers recommend against using friction compound on steertubes and other delicate parts. If an item still does not hold at the specified torque with friction compound, call the manufacturer – the item may be out of spec or it may be damaged from previous excessive torque.

What about parts with multiple bolts?faceplate-tightening-order 
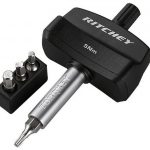
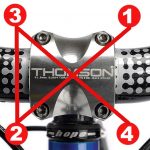
When parts have multiple bolts, the bolts must be tightened sequentially. You should increase torque by a small amount on one bolt, then move to the next until all bolts are at the specified torque.  With four bolts or more, you should tighten in a crisscross pattern to distribute pressure evenly over the greatest surface area.


Mention this post during March of 2017 and get 25% off any torque wrench we sell at Durham Cycles!


Safety in Numbers

Below is the handout from our recent “Safety in Numbers” seminar. Do you have “DOs” or “DON’Ts” to add to our list? Send us an email through our contact form.

Gran Fondo Manifesto:

Group cycling is a healthy, fun, and enriching activity, but it can also be dangerous. Cyclists who chose to participate in group events should always endeavor to be attentive to their personal safety and the safety of others. At the same time, participants in such events should understand that when riding for several hours, even the most experienced cyclists have lapses in attention that can put others at risks. Cyclists should hold all well-intentioned riders, including themselves, blameless for these lapses regardless of their consequences.

DOs and DON’Ts

Do:

  • Signal all turns both visually (when safe to do so) and verbally
  • Identify all hazards in the road
    • Point (if safe to do so) and call out: “Watch… “
  • Signal changes in pace: “Slowing!”
  • Signal when passing: “On your left!”
  • Signal oncoming traffic on narrow roads: “Car Up!”
  • Signal passing traffic: “Car Back!”
  • Relay signals forward and back in the group

Hand Signals

Remember, this is no time to be shy. Speak–or shout–loudly and clearly enough for other riders to hear you over wind and traffic noise. It’s preferable to use both verbal and visual signals, but if you feel unsafe taking your hands off the bars, a loud and clear verbal signal will suffice.

Don’t:

  • Make unnecessarily sudden changes in pace
  • Make unnecessarily sudden changes in direction
  • Overlap wheels (“half-wheel”)
  • Take both hands off the bars
  • Ride in aerobars
  • Use your phone or any other distracting device
  • Put your hands on another rider or bike in motion


Shifter maintenance

Have you changed your shifter cables recently?

Shimano and Campy riders should change rear shifter cables every three months under heavy use (200+ miles per week), every six months under light use. You may get longer out of your cables, but if you want to limit the risk of cable failure during a race or event frequent changes are recommended.

Due to the tight circle the cable follows around the ratcheting mechanism inside the shifter and the sharp, metal edges of the cable channel, Shimano and Campy shifters fray cables right below the cable head. (Sram uses a resin cable channel on most shifters and cables are much less prone to failure.)

Have you changed your shifter cables recently? Shimano and campy riders should change rear shifter cables every 3 months under heavy use (200+ miles per week), every six months under light use. Due to the tight circle the cable follows around the ratcheting mechanism inside the shifter and the sharp edges of the cable channel, Shimano and Campy shifters fray cables right below the cable head.

Photo from http://binstedscyclingandtravelblog.wordpress.com/

The cables eventually break and can become jammed in the shifter internals, often causing irreparable damage. (We’ve got some special techniques to service supposedly non-serviceable Shimano shifters at DC, but they don’t work 100% of the time. Shimano will usually not warranty damage from broken cables.)

As riders only shift the front derailleur a fraction as often as they shift the rear, front cables generally last longer. Shops in Florida and other dead-flat states hardly see broken shifter cables at all due to how seldom riders shift.

In order to minimize damage from a frayed cable, if your shifting begins to work erratically, do not down-shift as this will only pull the frayed cable deeper into the mechanism. Try up-shifting—if your bike won’t up-shift, or if it labors to up-shift you may have a frayed cable. Leave your bike in one gear, pedal home easy, and change your cables!


Fundamentals of Triathlon Fit

In this blog I am going to explain some fundamentals of triathlon bike fit. Along the way, I will explain how a road bike can be successfully configured for triathlon use, but why a road bike should never be converted to a true triathlon fit. What follows can largely be considered an illustration of work by Dan Empfield, whose writings at slowtwitch.com should be consulted by anyone looking to explore the subject further.

.   .   .

Triathlon fit requires a great deal more precision than road bike fit. Road riders regularly change position in response to terrain and according to the type of effort they need to make. Road riders regularly relieve stress by changing hand positions, bending their elbows, and shifting fore and aft on the saddle. Triathletes, by contrast, are in a largely fixed position and usually exert the same type of threshold effort throughout an event. Triathletes are thus more likely than road cyclists to experience pain, discomfort, and injury if fit is not precisely tailored to the individual’s body and riding style. That said, as the images below demonstrate, road and triathlon fit have certain essential qualities in common. Let’s begin with a traditional road fit:

Durham Cycles, Road Fit A

Please note, images are not to scale. The angles depicted are for illustrative purposes and do not indicate “proper fit” for any given rider.

Above we see a rider in a traditional road position. The angle at the intersection of the black and red lines is called the “hip angle.” Hip Angle is measured from the clavicle to the center of the bottom bracket with the ball of the hip (greater trochanter) as the axis. (“Hip Angle” is another way of referring to “drop,” or how tall the handlebars are relative to the saddle.) Many riders – and some fitters – believe a triathlon fit involves simply putting on aerobars, creating a smaller hip angle and thereby lowering the rider’s frontal profile. A true triathlon bike fit, however, does not require a change in hip angle.

Durham Cycles, Tri Fit AThe rider above is the exact same as in the first image, but rotated forward 7 degrees from the bottom bracket of the bicycle. The hip angle remains unchanged from the road position, but after rotating forward, the rider’s shoulder has dropped considerably below the dotted line that had intersected the clavicle. The forward rotation, not a reduced hip angle, creates a lower frontal profile and a reduction in drag.

In general, a fit triathlete will decrease his or her hip angle an additional 10-15 degrees from the road position, but many successful age groupers retain a hip angle fairly close to that of a road bike. Final hip, knee, and shoulder angles are often within just a few degrees of the road bike. The image below, for example, shows the final numbers from a recent fit for a member of the Duke University triathlon team.

Durham Cycles Tri Fit C

.  .  .

Now that we have a basic understanding of triathlon fit, we can better understand why we can’t mimic a triathlon position on a traditional road bike:

home-3If we simply rotate the rider forward as we did on the triathlon bike, the rider will have far too much weight over the front wheel and the bike will become unstable.

Durham Cycles Road Fit Tight Hip

Alternatively, if we simply install an aero bar on a road bike, the rider will need to reduce his or her hip angle, which will compress the perineum, the soft tissue at the groin. Pressure on the perineum can cause numbness and may lead to vascular damage. In addition to compressing the perineum, the reduced hip angle will compress the diaphragm making it more difficult to breath.

While a road bike may not accommodate a true triathlon fit, many riders compete successfully in triathlons on road bikes. Road bikes are especially good over shorter distances where aerodynamics are less important or on hilly or twisting terrain where a triathlon bike may not provide optimum handling. When using a road bike for triathlon, we recommend maintaining a position that retains the comfort and versatility of a road bike, even if it sacrifices some of the all out speed of a dedicated triathlon rig.

Durham Cycles Compromise Position 1In the “compromise” triathlon position above, the rider uses “shorty” aero bars which usually do not extend much beyond the brake hoods. The position typically requires a smaller shoulder angle, which may create stress in the neck and shoulders. A slightly taller and longer stem generally will allow a rider to maintain a larger shoulder angle [dotted line], but may compromise the bike’s handling. (Consult with an experienced fitter before altering bicycle stem length.) The compromise position may include a slightly steeper hip angle or slightly steeper shoulder angle, but the rider remains essentially in a road bike position. Most of the aerodynamic benefit of the compromise position is attained by narrowing the rider’s frontal profile rather than by lowering it.

.   .   .

I hope the above has been a good introduction to the basics of triathlon fit. As always, whether being fit at Durham Cycles or anywhere else, bicycle fit is a dynamic process that requires rider feedback over time. Some fit issues will require the expertise of a trained medical professional. The staff at Durham Cycles are not medical professionals and do not claim to offer medical advice. If you experience pain, numbness, or physical discomfort during or after riding a bicycle consult a physician. DO NOT ride through discomfort.

David LoSchiavo

Durham Cycles is Fit Kit Level 3 certified, but does not endorse any commercial certification program.


Wheel Tools

Tools of the Trade – Installment 2

Installment 2: Wheel Building Tools (Read Installment 1)

Wheel building is often described as an art, not a science. In part, the description is accurate because artisans were building excellent wheels which maximized the properties of available materials long before those properties could be quantified. Even now that companies can accurately measure the forces exerted on spokes, rims, and hubs, most attempts to re-engineer the wheel end with manufactures returning to traditional designs.

Shimano's abandoned "lateral crossover" spoke pattern

Shimano’s abandoned “lateral crossover” spoke pattern

http://www.bikepartsplace.com/images/med/31712574.jpghttp://www.bikepartsplace.com/images/med/31712574.jpg

FSA attempted to solve a problem that never really existed and introduced new problems all its own.

Shimano, for example, returned to traditional spoke patterns after a brief attempt to build wheels with paired spokes crossed to opposite sides of the rim.  While I suspect the idea was to improve lateral stiffness by increasing the effective bracing angle of the spokes, the reduced spoke count and soft rim made for a notoriously “spongy” wheel.

FSA tried wheels with a third flange and a set of radial spokes.  The center spokes were designed not for structural support, but for radial truing. Unfortunately, the design allowed a wheel to be built round, but with uneven spoke tension, leading to shortened spoke fatigue life.


While most of the radical changes in wheel design have faded into history, small improvement, mostly in the way spokes attach to rims and hubs, require the wheel builder to be supplied with an arsenal of tools:

Wheel Tools

A selection of wheel building tools from Durham Cycles’ bench

  1. Nipple winder: Traditional tool used to quickly thread nipples onto spokes.
  2. Thru-axle adapter: Modern mountain bike wheels use large, removable “thru-axles.” “Thru-axles” reduce differential movement between dropouts on suspension forks and rear triangles. Adapters are needed to build and true thru-axle wheels which do not fit in traditional truing stands
  3. Mavic and Shimano spoke wrenches: Some Mavic and Shimano wheels use proprietary spoke nipples. Unlike traditional spoke wrenches, the the Shimano and Mavic wrenches intersect the rim at a 90 degree angle to accommodate placement of tools used to hold bladed spokes straight during building and truing.
  4. Traditional spoke wrenches f0r the most common size nipples: 3.2, 3.3, and 3.5mm. The grey wrench is for splined nipples made by DT swiss
  5. “Lefty” adapter: Cannondale makes suspension forks which only attach to the wheel on one side. These wheels don’t use a traditional axle and need an adapter to fit in a truing stand.
  6. Assorted spoke wrenches for adjusting internal nipples (nipples contained in the body of the rim) and tools for holding various gauges of bladed spoke so that they do not twist when tightened.
  7. Park TM-1 tension meter: Tension meters ensure spokes are tightened evenly to limits specified by rim, hub, and spoke manufacturers. While traditional builders brag of their ability to build wheels acoustically, using the relative pitch of each “plucked” spoke as a proxy for accurate tension measurement, in a modern shop, a well-calibrated tool is preferred over the mechanic’s intonation.

Read installment 1


Tools of the Trade

Tools of the Trade, Installment 1 (Read Installment 2)

Every well-equipped bicycle shop is a museum. While no historic bikes may line the walls, a mechanic’s tools record the history of the industry in their form and function. Some tools tell stories of genuine advancements in manufacturing and materials, but more tell stories of innovations derailed by market forces; of large manufacturers trying to recapture market share from smaller, more innovative rivals; and of once dominant companies trying to find their way in markets that have left them behind. Any well-equipped bicycle shop needs to be a museum because bicycles remain in service long after internecine battles are over and long after technological detours are abandoned. It is a testament to the simplicity and elegance of the machine–and to the historical sense of the mechanic–that riders expect a hundred year old bicycle to be as readily serviced today as on the day it left the factory.

_DSC0002-Edit

Scotty’s well used Heliocomatic tool

The Helicomatic Tool

Until the introduction of the french made helicomatic system in 1982, most bikes were equipped with freewheels that threaded onto the hub shell. Because freewheels continue to tighten as one rides, they require significant force to remove. The heliocomatic system, however, made removing a freewheel as easy as twisting a bottle cap. (And if you actually had a bottle top open, the heliocomatic tool could do that too.) Despite the elegance of the French design, the Japanese freehub system became the more popular alternative to the freewheel–in part because of an economic climate which favored asian products as original equipment on bikes. The heliocomatic system went out of production in the late ’80s. You can learn more about the Heliocomatic System at The Heliocomatic Museum

_DSC0038-Edit

A collection of freewheel tools which remain in regular use despite the advent of the Heliocomatic system and the Shimano freehub.


_DSC0026-1-Edit

Park BB30 Tool

 Park BB30 Tool

Cannondale introduced the BB30 bottom bracket standard in 2000. The BB30 system presses oversized bearings directly into the bicycle frame. The large interface required for BB30 bearings means companies can use larger diameter tubing and build lighter and stiffer bikes. Shortly after its introduction, Cannondale began licensing the system, which is now in wide use. Because BB30 bottom brackets are not directly compatible with Shimano cranks, smaller companies such as Sram and FSA became more widely offered as original equipment on bicycles. The Park BBT-30 tool and bushings, in conjunction with a traditional headset tool, are used for installation and removal of BB30 bearings.


_DSC0026-Edit

Park BB90 Tool


Park BBT90 Tools

The BB86 is Shimano’s answer to the BB30. The BB86 contains bearings in cups which are pressed rather than threaded into the frame. BB86 cups have the same outer diameter as BB30 bearings, but the inner bearing accepts a narrower, 24mm, Shimano spindle. Of course, the BB86 (and the similar BB90 and BB92) require their own special tools.


_DSC0019-1

Park CBP-3, Power Torque Tools


Park CBP-3 (for Campagnolo Bottom Brackets)

Campagnolo, which had once been large enough to set trends in the industry, no longer has the market share to dictate manufacturing standards, so they developed a bottom bracket system which would adapt their cranks to the new BB30 and BB86 standards as well as fit traditional, threaded bottom brackets. The system requires bearings to be installed directly on the bottom bracket spindle utilizing a slide hammer. Bearing removal requires a specialty bearing puller used for few other applications. The system may be inelegant, but the tools are not.

Phil Wood Bottom Bracket Tool

Phil Wood has designed bicycle hubs, bottom brackets, and bicycle tools since the 1970s. Still known for producing high-tolerance, beautifully executed components, Phil Wood bottom brackets allow the mechanic to adjust a bicycle’s chain-line (the alignment of the chainrings relative to the freewheel or cassette), something which cannot be done on modern press-fit bottom brackets. We only get to use the Phil Wood tools a couple of times a year.

Phil Wood Bottom Bracket Tool

Phil Wood Bottom Bracket Tool


“Tools of the Trade” will be regular feature. Look for the next installment sometime in January.


Scotty’s Tool Wall